Pages

Search This Blog

Sunday, March 27, 2011

I went junkin'... and transformed a boring wall!

Now that the weather has become more agreeable I have been stopping at some of my favorite jaunts to
"junk".  Pictured below is what I scored recently.  It is a very large hoop used for embroidery or hand quilting.  I paid $5 for it. 
As soon as I saw it I knew I wanted to use it in my office.  So I went to Joann fabrics and purchased some material which was score #2 of the day.  Remnants were 1/2 off... yipee!  So I used my coupon to purchase a few additional decorative items.  Below is what I picked out. 
Total cost at Joann's was under $30.  I found the bird plate below at Marshall's for $2.99 and the small Limoges white plate with black writing at the flea market for $1!

   with a glue gun I attached wire hangers to the backs of the plates ...

I also framed an "E"

I added chicken wire to this gold frame and picked up a bag of mini wooden clothespins.

I had a few small embroidery hoops of my own so I grabbed those from my craft box.  Then I strectched the purchased remnanct over the hoops and cut away the excess.  Using the embellishments I purchased like wired ribbon, fabic flowers, ball fringe, straight pins, a small wooden P, etc.,  I started "playing".  I combined my purchaces with family photos and child hood memorabilia and below is how the wall in the office turned out...

The color quality of the picture is very poor and I apologize.  The wall color is Sherwin Williams Heather Sage-- a soft grey green color.  The fabrics I chose compliment the wall color as well as introduce a brighter, livelier color palette.  I had enough fabric to make pillows for the rocking chair in the opposite corner.     

This is a picture of the room entering from the foyer.  The color quality in this photo is a bit more accurate.

I am so happy with the result!  I added organization, functionality and a touch of femininity to this once boring wall and color scheme.  Best of all, the wall will always be interesting each time I update the photos and memorabilia.  If the wall color ever changes, a simple swap out of fabric will keep the room coordinated.  One last look...  taa daa...


Hope you've been able to sneak away to your favorite jaunts.  Bee well, Elizabeth

Saturday, February 26, 2011

[Sigh] tings at West Elm...


I recently spent an evening curled up with a copy of West Elm's latest catalog.  Below are just a few items to catch my eye.   Love these fresh looks!
Bubbles Ceramic Side Table
Spring Floral Duvet + Shams
Spring Floral Duvet
Modern-Weave Headboard
Mercury Mushrooms
Mercury Mushrooms
Bone Spreaders
Bone Spreaders

Thursday, February 17, 2011

Organize, Organize, Organize


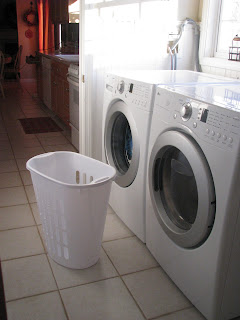
We're getting organized and it's a beautiful thing!  My Busy Man added shelves to this laundry room closet and I got busy painting and organizing it.  I just love when everything is in it's place. 


This is a shot of the oposite side of the closet.  Yes, that's my tool box!


Because I am outnumbered in my household 3:1, I took advantage of the organizing by making these laundry signs that hang above the laundry baskets.  Now I have my guys sorting the laundry for me!!  What a big help it is. As you can see below, I just carry the full laudry bin to the washer and empty it in.  Ahhh... simplicity!  I am on a mission so there will be many more organizing projects to share.  Bee well!  Elizabeth

Sunday, February 13, 2011

February 13th


           Wishing you and your Valentine a very happy day....

Saturday, February 12, 2011

Snow Day #3--A Coat Rack is re-engineered


Isn't New England beautiful.  This is what the landscape looked like after storm #3 passed through.  While we were under siege I got busy inside.  I thought I could do something with this... a coat rack which I paid $10 for.
The entry way to our home is nearly nonexistent.  No grand foyer here!  Opening our front door practically forces you up the stairs leaving no room for your guests to enter.  Making this space more practical is certainly a challenge!   The photo below is a shot from the staircase looking down.


See what I mean.  The coat rack's legs were wide which made getting around it clumsy.  I took the legs off and stared at the post for about an hour.  While pondering the next step, I painted the door.  Next, I stripped the post of all it's hooks.  To the left of the door I have the narrowest bit of wall...  yup, just enough wall to hang the coat rack post on.  I loved the mismatched hooks so back they went.  This is what I did...  and I am so pleased with the result.  A little quirky, practical, and adds interest to the space.  perfect!  These are a few different shots of the re-engineered coat rack...


Make the most of your (SNOW) day!!!  Elizabeth